So you want your interior cleaned? No problem.
At this point, we’ve cleaned hundreds of interiors on a wide variety of vehicles and conditions.
Everything from leather, cloth, suede, alcantara, plastic, vinyl, etc…
And it doesn’t stop there. We’ve seen our fair share of stains in all those interiors:
It depends on the type of surface we’re cleaning, how dirty it is, the type of fabric, and the results we’re going for.
So if it’s a really bad stain, we’ll use a more aggressive cleaner with more aggressive cleaning methods to tackle the stain the best we can.
If it’s not that bad, we’ll use the appropriate cleaners, tools, and methods to remove the stain.
This is the part most people refer to it as “shampooing.”
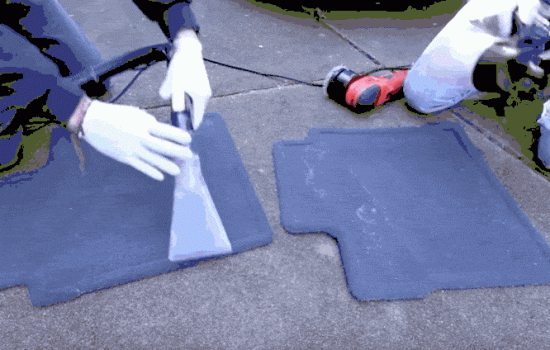
When it comes to cleaning fabric surfaces, no matter if its seats, floor mats, carpeting, or parts of door panels, it usually follows the same process:
Vacuum the surfaces to get a clean slate to work with. We don’t want any loose debris or dirt getting in our way when we’re cleaning the fabric.
We’ll spray the cleaner onto the fabric and let it dwell for a few seconds so it can penetrate the surfaces. Next, we’ll use a one of our many brushes to agitate the fabric.
Next, we’ll use our carpet extractor so it can inject water into the fabric to push out the cleaner and dirt while at the same time, vacuum it all out.
Finally, we’ll use several towels to mop up the surface so it can dry faster.
If we think it needs another pass, we’ll simply repeat the process until we’re happy with the results.
And no worries, it’s not going to take hour and hours for your car to dry.
If it’s relatively warm outside, then by the time we’re done with the detail, your interior will be 85% to 90% dry.
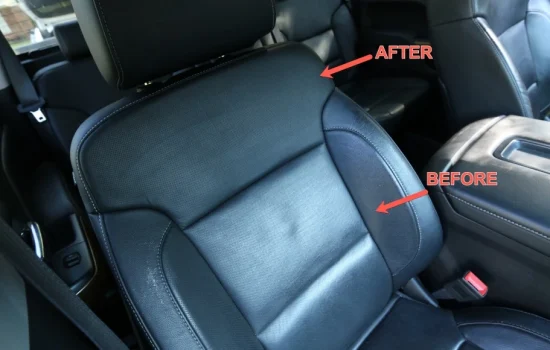
When do you know it’s time to clean leather seats? Usually there will be a sheen to the seat.
Meaning the seats look a bit shinier than when you first purchased the vehicle. There shouldn’t be a “reflection” from your seats.
That’s actually all the sweat, dirt, grease, etc… that’s accumulated on the surfaces over the last few months or years.
Unlike fabric seats where we’ll spray into the seat, when it comes to leather, we’ll sometimes spray onto the seat or spray into the brush first.
We do this to minimize the chance of causing any streaks from spraying the cleaner directly onto the seat.
We’ll then agitate the seat, wipe it down, and inspect.
It’s pretty easy to tell if we’re satisfied with the results because the sheen will be gone and it’ll return to it’s natural looking texture.
If we’re not satisfied, we’ll simply spray more cleaner onto the brush, agitate, and wipe down.
Towards the end of the detail, we’ll condition the leather seats to hydrate and protect them.
Surfaces like the door panels, dashboard, center console, cup holders, etc… are cleaned the almost the same way.
Yes, they look different, maybe have slight differences in texture and material, but for the most part, it’s made of plastic.
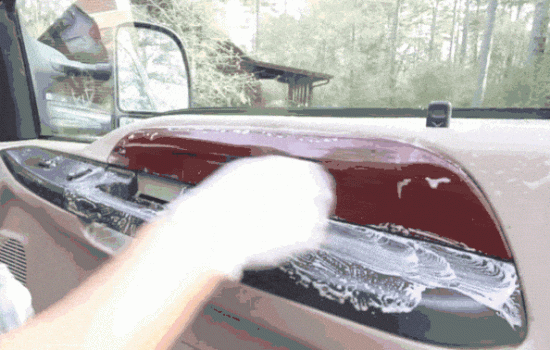
Door panels: We spray onto the brush (or onto the door panel, depending on the condition), agitate, and wipe it down.
Usually if we’re working in the sun or heat, we’ll break down the door panel into sections. We do this so we can actually clean the surfaces without them drying before onto the material.
If we spray the entire door panel down and it’s hot outside, before we even get to the bottom section of the panel, the cleaner has already dried up.
Dashboard/center console: The dashboard follows the same procedure, except with different brushes since we have to reach more smaller and detailed areas.
And since there’s so many electronics and buttons, we don’t use as much cleaner. We also never spray the cleaner onto the surface when it comes to the dashboard.
We always spray into the brush and then clean the surface. If we spray the cleaner onto the surface, there’s a higher chance of the cleaner getting into areas we don’t want it to.
For example, if we sprayed a cleaner onto the instrument cluster, some of it can get behind the plastic and then there’s no way for us to clean it.
To us, if the door jambs are not cleaned, the detail is not complete.
Regardless if we’re doing an interior or exterior job, the door jambs is like the icing on the cake.
It’s just that last little detail you can get that brings everything together. Maybe it’s just us, but that’s how we feel!
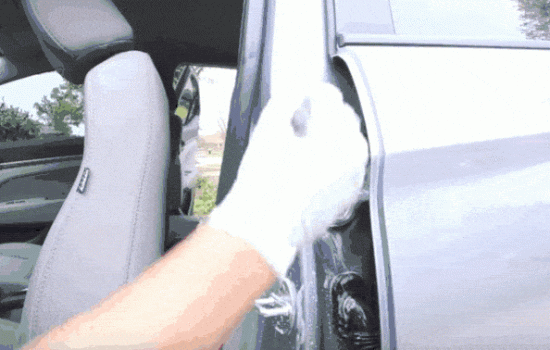
If they’re not that dirty, then we’ll simply spray our cleaner on the surfaces and wipe them down with a towel (if needed, we’ll use a brush to get into the detailed areas).
If your door jambs are extremely dirty, then we’ll rinse off the jambs to remove as much dirt and debris, then follow it up with multiple brushes and cleaners.
Then we’ll rinse it again and wipe the jambs down with towels to remove any water, cleaner, or dirt residue.
To be honest, I think most detailers don’t like cleaning glass.
It’s probably one of the most difficult and time-consuming parts of the detail to get it done right.
It seems simple like you just spray a cleaner and wipe it down with a towel.
To truly get streak-free windows, it takes a lot more work, specifically the front windshield.
We use Optimum No Rinse diluted as a clay lube. We’ll usually go through 3 to 5 towels to complete the interior side of the glass and mirrors.
The first step is we spray onto the towel or glass (depending on which one we’re cleaning) and simply wipe to get a majority of the gunk of the window.
Next we’ll spray the cleaner onto the towel and wipe down the window again. We make sure we’re getting all the edges for a complete cleaning.
Once that is done, we immediately give the towel or window a small mist and wipe it down with the third.
The first towel is meant to just take majority of the gunk. The goal isn’t to make it streak-free on the first pass.
The second towel is used to give it the clarity we’re looking for. The third towel, used with the least amount of cleaner and pressure, is used to give us the streak-free window appearance we’re looking for.
This can often take a few tries to get right. Especially if the window has a lot of gunk build up.
8 out of 10 times, the worst window in the car is going to be the front windshield. But sometimes it can also be the back row if you have kids or a dog 🙂
The headliner and visor is one of the parts we’re most careful of depending on the age of your car or the type of fabric it is.
It’s very easy to change the permanently change the direction of the fibers, making it very obvious we cleaned it.
So when it comes to cleaning any stains or marks, we go with the lightest cleaner and cleaning methods to get the best results.
There’s been plenty of times where we don’t try to get the entire stain out because that would require a more thorough cleaning, but then the fabric would look much different compared to the rest of the headliner.
Our cleaning process is usually as follows:
Spray our cleaner onto a towel and gently agitate the stain with the towel with little pressure. We’ll repeat this process over and over until we’re satisfied with the results.
If necessary and able, we’ll use a steamer to break apart the stain and wipe down gently.
And that wraps up most of the cleaning!
Keep in mind this wasn’t meant to give you every single last step we take to clean your interior.
We wanted to give you a deeper look into the process, but there’s still plenty of things we left out to not turn this guide into a book 🙂
